
Many of the times, we have to create multiple jobs for building code. The biggest problem is with the branched repositories as each of the repository has master, develop, release branches. The usual pattern was to manually duplicate the develop/master/release build and change the branch it checks out and monitors.
Multi branch pipeline plugin now adds a new type of job to jenkins. This job is lot simpler to setup compared to other build jobs. The main reason for this is that it does not actually have setup as the build instructions are shifted to the job code itself. The Build instructions in this case are defined in the Jenkinsfile.
The jenkinsfile file is all that needs for jenkins to execute the build. If the first branch created in repository has Jenkinsfile , then all corresponding branches created will have the repository.
So in simple terms a multi-branch pipeline simply scans the source code repository and create a pipeline job automatically for each branch available which contains the Jenkinsfile. For example, whenever a developer creates a new branch with a Jenkinsfile, it creates a pipeline job and executes it automatically. Hence it eliminates the manual creation and maintenance of Jenkins pipeline jobs. It is also useful for validating pull/change requests. It can automatically build the new branches, thereby drastically reducing the number of “surprises” upon the final merge. Therefore, it helps to keep the main code line stable.
In this article, we will see how we can configure a Multi branch pipeline in our jenkins server.
1. Create a Job “multi-branch-pipeline” and choose the job type as “Multibranch pipeline”.
2. Add the Branch Source. In this case, we choose the git and provided the github repository url and credentials for connecting to the github.

3. Now once you click on save, Jenkins will connect to the github repository and scan the repository and created appropriate items for each branch in the repository which contains a Jenkinsfile. Now if your repo has 2 branches , it will then create 2 jobs for 2 branches with names and then run them. Since each branch has the Jenkinsfile available, jenkins will use that file to build the job as shown below. My repo has both master and feature-1 branches which are now ran successfully based on the Jenkinsfile.

4. As we already discussed, additional facility with this Multi branch pipeline is that it automatically index for new branch additions and deletions. By default jenkins will not re-index the repo for branch changes. We have to configure the multi branch pipeline to periodically re-index the repository for branch changes. This is set by choosing a interval under the Scan Multibranch Pipeline triggers. I set that to 5 minutes, which means for every 5 minutes jenkins scans the github repo for branch changes.
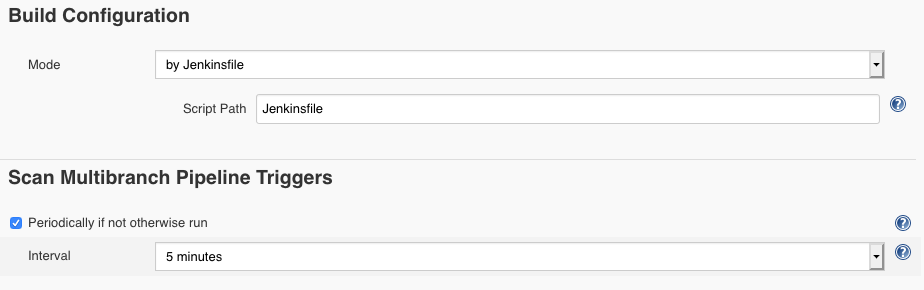
Also we have a option to choose the build configuration file and Jenkinsfile file the only option available now.
5. On the jobs main page, we can see two options
Scan Multibranch Pipeline now - this will let jenkins scan the repo for branch changes right away.
Scan Multibranch pipeline log - log details about how the scan happened, how much time it took etc. Hope this helps in starting with Jenkins multi branch pipeline.
No comments :
Post a Comment